
Upgrading to Windows 11 Pro for Workstations gives you the most powerful desktop edition of Windows — built for server-grade hardware and heavy workloads. In this guide, you’ll learn how to check requirements, download official media, install, and activate it correctly.
1. Check System Requirements
Before starting the upgrade, make sure your computer meets these minimum system requirements for Windows 11 Pro for Workstations:
- Processor: 1 GHz or faster with 2 or more cores on a compatible 64-bit processor (supports Intel Xeon, AMD Opteron, and other server-grade CPUs)
- RAM: 4 GB minimum (16 GB or more recommended for workstation tasks)
- Storage: 64 GB or larger storage device (supports ReFS file system and faster storage configurations)
- System Firmware: UEFI, Secure Boot capable
- TPM: Trusted Platform Module (TPM) version 2.0
- Graphics Card: DirectX 12 compatible graphics / WDDM 2.x
- Display: >9″ with HD Resolution (720p)
- Internet Connection: Required for updates, activation, and some features
2. Download the Installation Media
To install Windows 11 Pro for Workstations, you’ll need the official installation media. Use Microsoft’s trusted link:
Download Windows 11 Installation Media
Here’s how:
- Click the link above.
- Click Download tool now.
- Double-click the downloaded file.
3. Install Windows 11 Pro for Workstations
Install Windows 11 Pro for Workstations on Your PC
Once downloaded, you can follow the guide below to install Windows 11 Pro for Workstations on your PC. Here you can make a bootable USB drive using Rufus, which can help you install the system. To do that:
Step 1. Download Rufus on your computer, connect the USB, and run Rufus to create a bootable USB drive.
Need help creating bootable media? Follow this guide: Creating a Bootable Windows USB Drive
Step 2. Once created, restart your PC and press F2 or the Delete key while starting to enter BIOS. Then set the USB drive as the first boot order so that your PC boots from the USB.
Step 3. Press any key to continue and click on Next. Then click on Install Now.
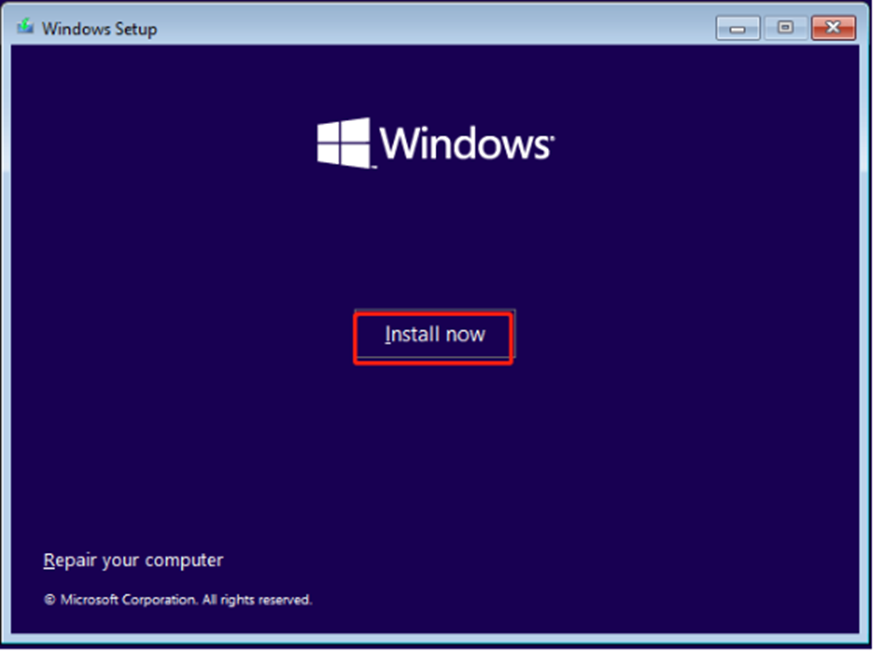
Step 4. Enter your Windows 11 Pro for Workstations product key or select I don’t have a product key.
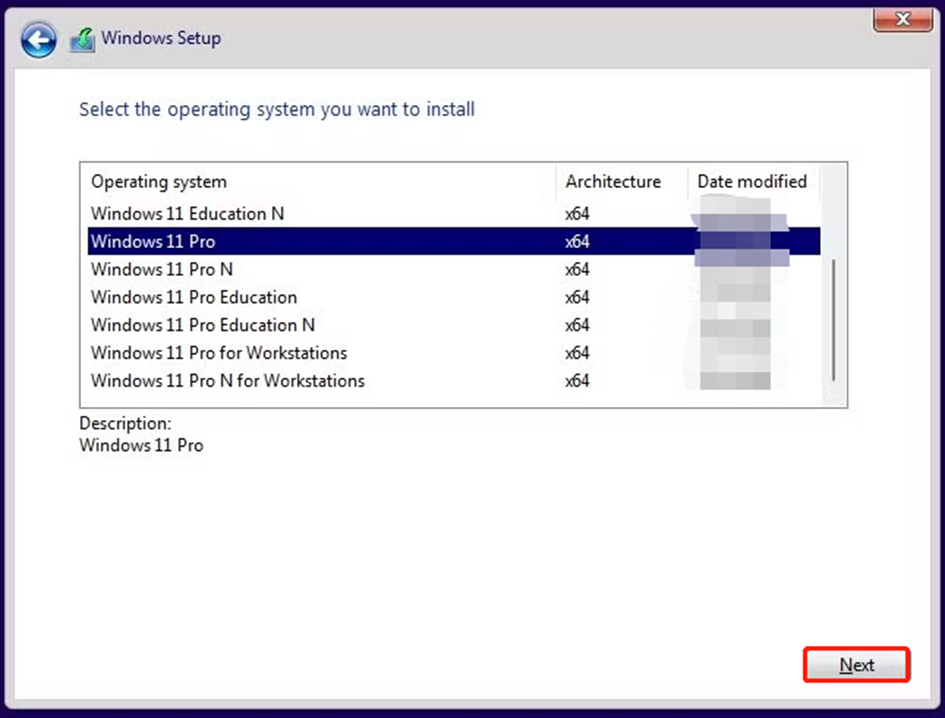
Step 5. Select the operating system you want to install and click on Next.
Step 6. Tick the checkbox beside I accept the license terms and click Next.
Step 7. Then follow the on-screen instructions to complete the installation.
4. Activate Windows 11 Pro for Workstations
After installation, you’ll need to activate your product key:
Go to Settings → Update & Security → Activation.
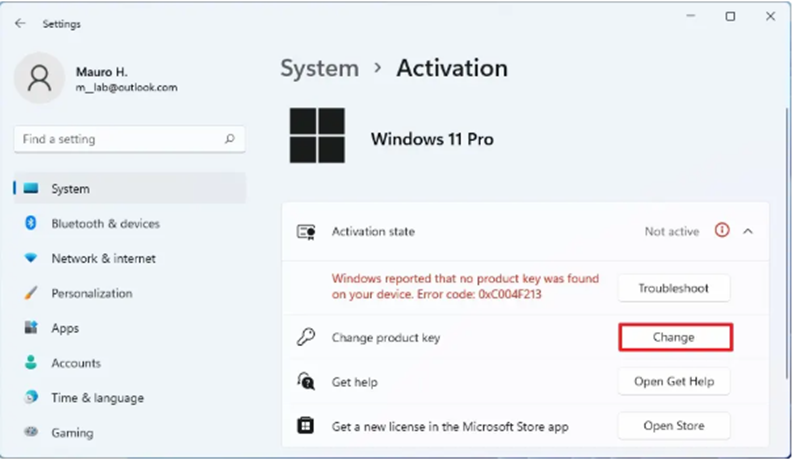
Click Change product key.
Enter your Windows 11 Pro for Workstations key.
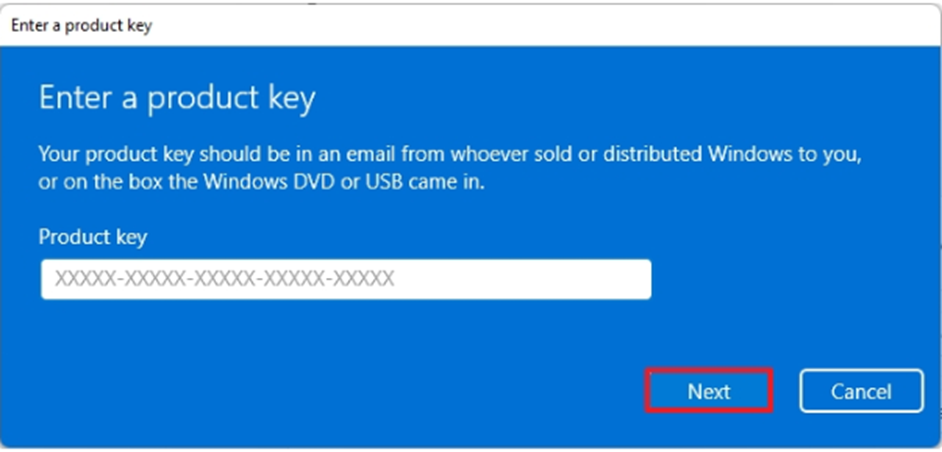
Click Activate.
Once activated, your system will be fully licensed and ready to use.
Why Choose Windows 11 Pro for Workstations?
Windows 11 Pro for Workstations delivers unmatched speed, reliability, and performance for advanced users. With support for server-grade CPUs, massive memory capacity, and high-speed file handling, it’s built for engineers, researchers, designers, and businesses that rely on heavy workloads.
Get Your Genuine Windows 11 Pro for Workstations License
Ready to make the switch? Purchase your Windows 11 Pro for Workstations license today and enjoy lifetime activation at an unbeatable price.
Buy Windows 11 Pro for Workstations License Key
Upgrade your PC today and experience the future of Windows!
Need help now? Contact us and we’ll recommend the best licensing mix.